Tuesday, October 22, 2013

2nd Grade Landscapes

Jug Bay Natural Area in PG County
2nd Grade's Landscapes

We are continuing with our study of the artist Vincent Van Gogh and his many wonderful works of art.  For this project we were looking at examples of some of his many landscapes.  

We learned that landscapes are paintings or drawings of things found in nature; for example trees, hills, fields, and lakes. We also learned that there are 3 sections in a landscape. There is a foreground, a mid-ground, and a background.

The grass in the foreground is larger than anything else in the landscape because it is closer to us.  The wagon and person in the mid-ground are medium sized objects; they are not as close to us as the items in the foreground so they need to be smaller, to show that they are further away.  The items in the background such as the mountains and houses are drawn very small because they are very far away from us, and the way to show that they are far away is to draw the mountains and trees smaller than the people in the mid-ground and the grass in the foreground.  

For our landscape the students looked at 2 pictures from a local natural reserve in Prince George's County called Jug Bay.

They were able to pick which picture they wanted to base their landscape off of.  We first drew out the items in our landscape in pencil. Then using markers we added patterns to the different areas in our landscape (example short lines of dark and light green in the grass areas).


Once all areas were filled with patterns, the students used a small amount of water to blend their markers together to get a painted effect on their landscapes similar to Vincent Van Gogh.
Take a look at the wonderful examples of students' artwork below.

Once completed with their landscapes the students filled out a worksheet that asked them to identify what elements of their landscape were in the foreground, mid-ground, and background of their landscapes.


4th Grade Landscapes

Warm vs. Cool Color Landscapes

Our landscape project this year, included a lot of review.  We reviewed our colors (primary, secondary, warm and cool), shapes, the elements of a landscape, and the Element of Art Texure. The fourth graders were also introduced to a new artist this year David Hockney and his artwork Mulholland Drive: The Road to the Studio.

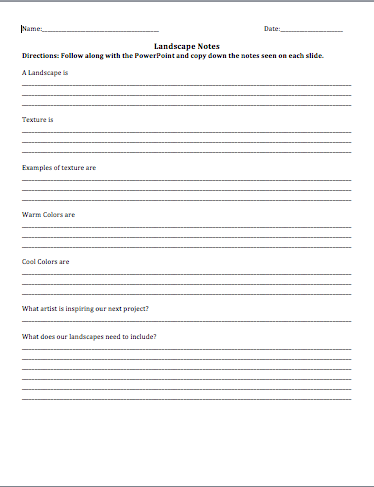
We started off by looking at our Landscapes powerpoint and the students took notes as we went along. 

The worksheet the students used as we went through the powerpoint.

They then had to plan out their warm and cool colored landscape, using their pre-planing worksheets.
Below are some student examples of their landscape plans.  


Thursday, October 10, 2013

"Headless" Self-Portraits

Preview of Art 2's Headless Self Portraits

For this year's drawing quarter, I wanted the students to focus on creating a self portrait.  However, instead of creating another frontal view drawing of their faces, I wanted the students to create a more abstracted idea of a self portrait. 
For this project we were focusing on the element of art-value and the principle of design-emphasis.
The students were required to bring in 2 objects that represented themselves and their personalities; they must be able to interact with these objects in order for a photo to be taken of the students and their objects.  
We had a range of objects brought in everywhere from soccer balls to polished rocks found during a family trip, the students were very eager to get started.  


Last year the students use a grid to help them draw their portraits, this year I wanted the students to try to see the correct proportions without the assistance of a grid or guidelines.  

Here are some sneak peaks at what our students have been working on. 

The students are about halfway through this project.
One of their 2 objects will be colored in to create emphasis.


Wednesday, October 9, 2013

Van Gogh's Sunflowers


2nd Grade's 
Van Gogh's Sunflowers


In second grade we have been studying the artwork of Vincent Van Gogh.  More specifically for this project we have been looking at his paintings of sunflowers.  We began with a class discussion on the different colors and shapes we saw in his paintings. The list our classes came up with is below.  

Yellow             Circles
Red                  Rectangles 
Orange            Squares
Green              Ovals
Brown             Triangles
                        Crescent or Moon Shapes

Once we determined what shapes were needed to create our flowers, the students began to participate in a directed drawing.  
We started out by using our hand to get us the size and shape needed for the centers of our sunflowers.  The students were to have two sunflowers on our drawings (1 full flower and half a sunflower).  They were then to use triangles, crescents, ovals, and circles to create the petals for their sunflowers.  Then they used a long skinny rectangles to create the stems for their sunflowers.

The students were able to get such vibrate colors and great texture!!!

Wednesday, September 11, 2013

Positive Profile Portraits

5th Grade Positive Profile Portraits

In fifth grade one of the topics covered in Health class is a positive self-image. In trying to make that cross-curriculum jump, I wanted the fifth grade students to create Positive Profile Portraits.

They started out by choosing 10 positive character traits they felt matched their personalities. As the students were writing their 10 character traits and their definitions I called the students up to have the outline of their profiles traced.  After their outlines were traced, the students wrote their name and their 10 selected character traits on the outline of their profile (first in pencil, then again in marker).

Top 2 faces are pencil only outlines, bottom 2 are completed outlines in marker.
Top center piece are student examples of watercolor practice.
We are painting in our Positive Profile Portraits using watercolors in Analogous color scheme combinations.  The students practiced creating even washes and dark color outlines in watercolor before they could begin to paint their portraits.
The students are painting their portraits using 3 colors. The lightest color will be their background color, the mid-tone will become the base for their face, and their darkest color will become a bold outline to emphasize the profile of their faces.

More student examples to come!!

Monday, September 9, 2013

Small Medium & Large Shapes

Shapes and Shape Bugs

After being introduced to the Art Room rules and procedures, the first two projects I like to do are based around basic shapes and sizes.  With these projects I am introducing the Kindergarteners to basic concepts that we will not only be using and re-visting throughout this school year, as the students continue to venture down their artistic paths.

The first part of the project involved a group game where the students help to sort out a variety of shapes into the correct size categories.
Our Sorting Game-The students were able to walk up to the
SMART Board and drag the different shapes into the correct categories.
Part 2 of our Small, Medium, and Large project series involved the students picking from a pile of shapes on their tables.  These piles were made up of small, medium, and large triangles, squares, and rectangles.  The students had to select a small, medium, and large shape from the pile and then glue those 3 shapes down in order of smallest to largest.


The final stage of our Small, Medium, and Large lesson had students create a Shape Bug using small, medium, and large shapes.  We viewed a PowerPoint, that showed the students how our Shape Bug was created. The students drew along with the slides as our Shape Bug started out as a medium circle and grew to 4 medium circles with small shapes attached to it.


Here are some examples of the great Shape Bugs the students created.


Friday, September 6, 2013

Tech Art Stage Types

STAGE TYPES
STAGE LINGO

This year's Tech Theatre class is focusing a great deal on theatre theory, as well as designing concepts for our upcoming school drama production.

One of the first topics the students learned about were the variety of stages and performance areas there are to act on.  

The 4 types of stages we learned about.
The students took notes off a Powerpoint and viewed a youtube video hosted by Krista Price that described the different types and uses for the performance spaces. 
(if interested in viewing the video copy the link below into your browser)


Today we went over the basic theatre terms and acting areas.
Rigging 
Batten
GOBO
Scrim
Cyclorama (CYC)
Taveler 


We have covered a lot this week and all this information will help the students design their floorplans next week.